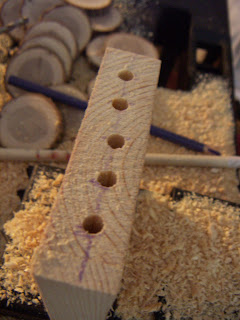
We started with a block of wood, preferably hardwood like oak. a good hardwood makes for a much clearer sound. Because I had no drill press a bit larger than Instructed, (11x7.5cm) for a more forgiving gap. ^ ^;
I drew a center line, marked the dots and punched a starter divot with an awl or nail to guide the bit. Using a small bit I bored the first lead holes.
Then i took the hole size up one extra stage with a 3/16" bit to make a nice straight bore, careful not to reach the actual intended depths.
Using a marked dowel to determine depth, I carefully bored the varying depths to make the different pitches.
Bit size 5/16"
in CM from low to high:
5.85 6.75 7.75 8.35 9.1
5.85 6.75 7.75 8.35 9.1
I used my 3/16" bit to bore a small hole in the high pitch corner for a strap. I used the 5/16" to bore a small divot to curve it in a bit.

Sand sand sand! The smoother you make it inside and out, the clearer your sound will be! Experiment with the depths using drops of beeswax to adjust the pitch.
And that's it! paint or seal with your preferred finish tie on a strap and have fun!


No comments:
Post a Comment
Note: Only a member of this blog may post a comment.